DVD Case Journal

Yesterday was my dear Husbands birthday and the kids wanted to make presents for their awesome Daddy! After looking on Pinterest for some inspiration, I quickly found that being a procrastinator was not working in my favor. I found tons of great idea’s but, I was always short at least one item!

I started frantically looking around my house to see what I had that could be reused to make a great gift. I finally found empty DVD cases and remembered seeing this great pin on Pinterst, http://stacyvaughnblog.blogspot.com/2012/04/dvd-coloring-case.html?spref=fb&m=1, and found all the inspiration I needed to make one awesome gift!

A DVD Journal, more specifically and Father/Daughter Journal and a Father/Son Journal so they can write and draw pictures to each other! It was a big hit!

DVD Case Journal:

Supplies:

  • DVD case
  • card stock or cardboard
  • scrapbook paper or construction paper
  • glue stick
  • scissors
  • box cutter
  • stationary paper or paper cut to size
  • items to decorate case

Directions:

  1. Remove the DVD label and place extra cardboard between the plastic film and the case.
  2. Using a box cutter cut out the part of the case that holds the DVD.                                                      IMAG1744  IMAG1747
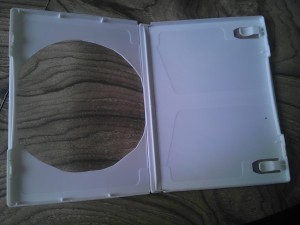
  3. Decorate the back of the DVD label or cut paper to size to decorate.
  4. Place label back in the case so that you can see your creation. The plastic film makes a great dry erase board and protects your creation!
  5. Cut cardstock or cardboard to fit over the hole in the case.
  6. Cut scrapbook paper or construction paper out to cover the cardboard.
  7. Using a glue stick, apply glue to the inside of the DVD case and the back of your creation and place cardboard on top, and then glue the paper over the cardboard.                                                                                                        IMAG1749 
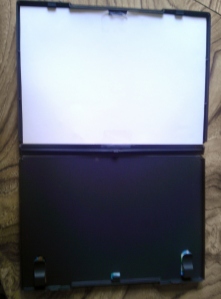
(This picture only shows the cardstock, not the paper over it. Did you notice its also on a different case?)
  8. Cut paper to fit on the other side of the DVD case by laying your paper over the case and create a seam using your finger and cut along the seam, like the picture below.                                                                                                         IMAG1756
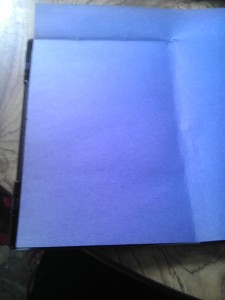
  9. Using the glue stick, glue the paper down making sure to go under the clips. Like the picture below step 10.
  10. Decorate the inside of the DVD case.
  11. Place stationary paper under the clips.

We added a laminated sheet of cardstock with a whole punched in at the top two corners and curling ribbon strung through it to put  inside the journal for a dry erase page that we can be used hang up the journal too! My kids love dry erase boards!

IMAG1764


After the kids finished making their journals I wrote “Happy birthday Daddy!” on the dry erase card and let the kids tell Daddy that it was to leave pictures and letters in for each other. They all loved it and the kids can’t wait to get their first note from Daddy!

IMAG1770         IMAG1766 The finished products!


Diaper Cake Tutorial

If you are looking for the perfect gift to give a new or expectant mother, or hosting a baby shower, there is nothing better than a diaper cake! Let’s be honest, nobody gets excited to get a box of diapers, sure they really appreciate them and they are very useful, but the reaction is not the same as getting cute clothes to “oohh” and “aww” at and we all want to give the perfect gift. A diaper cake is the perfect way to take a boring box of diapers and turn it into an “aww” worthy gift. Of course, if you are hosting the baby shower it also makes a great decoration! Diaper cakes can be simple or elegant and there are numerous ways to decorate them, but I will be showing you how to make a floral diaper cake.

You will need:

  • a box of size one diapers or larger. For this particular diaper cake I used a 180 count box of size one diapers.
  • small clear hair bands, you can buy a huge pack of these for $1 at The Dollar Tree.
  • large rubber bands.
  • ribbon or blankets to hide the rubber bands.
  • silk flowers
  • 2 nine ounce baby bottles
  • double sided tape

Instructions:

1. Lay the diapers on a table with the front side facing up.

IMAG1459

2. Roll the diapers up starting at the top of the diaper and place a small, clear hair band around the rolled diaper so that it looks like the picture below. If the diaper cake is for a baby girl you could also use the small soft hair bands to serve as an additional gift, however you may want to use the clear rubber bands on the outside layer of each tier so that it is not seen under the ribbon. Tip: You will use less diapers if you roll the diapers up loosely, however the outside layer will not only look better rolled tightly but, will hold the flowers better. I use loosely rolled diapers in the inner layers and tightly rolled diapers on the outside layers.

IMAG1461

3. Grab one of the baby bottles and place a large rubber band around it and place the rolled diapers between the bottle and rubber band. It should look like the picture below.

IMAG1466

Your diaper cake should now look like this.

IMAG1469

4. Now place a large rubber band around the first layer of diapers to make another layer by stuffing more rolled diapers between the previous layer and the rubber band.

IMAG1470

5. Repeat until you have the desired number of layers. The number of layers is dependent upon the size and number of tiers you want the diaper cake to be. For this diaper cake I used 5 layers on the bottom tier, to make a 4 tier diaper cake.

Once finished with the bottom tier your diaper cake should look like this.

IMAG1471 I know this picture only shows 4 layers, I added another layer after taking this picture and forgot to take another picture.

6. Place a rubber band around the top of the bottle that is sticking out of the first tier and repeat steps 3-5. For this diaper cake the next tier up was 4 layers.

Once you finish the next tier you will notice that the diapers cover the bottle completely. Your diaper cake should now look like this.

IMAG1474

If you only want a two tier diaper cake skip to step 8 , if not proceed to step 7.

7. Place double sided tape on the top of the bottle and place the second bottle on top of the other bottle and repeat steps 3-6. The next tier on this diaper cake was 3 layers and the top tier was 2 layers.

Once again the bottle will be completely covered, if you are going to place flowers on the top place a rolled diaper on top of the bottle, if not leave as is.

Now I apologize because my creativity took over once I completed all the tiers and I forgot to take pictures of the next few steps so bear with me and I will do my best to tell you how to decorate the diaper cake.

8. Decorate the diaper cake. If you are using ribbon as I did, place ribbon around the rubber bands on each tier and use the double sided tape to hold the ribbon together. I usually do not stick tape directly to the diapers unless the ribbon is not staying up.

If you are using blankets fold them up to the size of the tier you are covering and use double sided tape to secure the blanket.

9. To decorate the top of each tier with silk flowers you will first need to cut the stems or simply pull the flowers off of the stems. Place flowers in the center of each rolled diaper. The material of the diapers is usually enough to hold the flowers in place, if not use double sided tape to secure the flowers in place. If you use a full flower you may only need one flower for every other rolled diaper as I did.

If you are not using flowers you could use other baby supplies or small toys and secure to the diaper cake with double sided tape. You can use all sorts of things to decorate the diaper cakes such as, travel size bottles of baby wash, shampoo, lotion, to small toys or stuffed animals. Let your creativity flow, like I obviously did!

10. To decorate the top with flowers place a rolled diaper on top of the bottle, you will use this to place the top flower in but, before you place the top flower in, stick your flowers on the top tier by placing them inside the center of each rolled diaper. Now you can place your top flower in the center rolled diaper, this will give the top tier a dome effect.

You could also use stuffed animals or a basket of goodies to decorate the top if you do not want a floral diaper cake. The options are endless and just by doing a simple search you can find lots of inspiration for making your very own diaper cake!

When you are finished your diaper cake should look something like this.

IMAG1515

IMAG1517


Now sit back and enjoy giving the best baby gift ever!